I could say I have been hard at work making this tutorial but... mmmmmm... I have had some fun the last couple of weeks too! Who can resist going to the Moxie Festival in Lisbon or the Clam Festival in Yarmouth. I had lobster rolls and fried dough and fried clams galore! Fun, fun, fun!
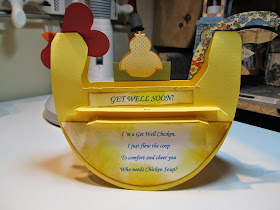
But I have also had some fun in my craft room too! I love these Slide N Glide cards! I have done a tutorial and made some templates in case you want to try to make one too! I do recommend, in my tutorial, using Poster Board for these cards. I used card stock on my Get Well Chicken but I find that the more Add Ons the more weight there is on the card. It can make the card stock bow. The Poster Board is only 97 cents at Walmart and you get a HUGE sheet of it! It is really light weight but heavier than card stock.
On the pirate ship below - I didn't use the 2nd flap. The 2nd flap really adds stability when you are adding stand ups to your card. I did use the the 2nd flap in my Get Well Chicken- which is on a previous post.
 |
| Side Shot |
 |
| Back of card |
 | |
| Underneath |
This video will show you how to put together the flaps of the card. I will do another video to show you how to add the additional stand up pieces that you might want to use to decorate the card. Sorry to have to do it in 2 parts but I know my camera will only do about 10 minutes in taping and I felt it would take longer than that to show you all I wanted to show! Watch for my next post!
I finally figured out how to add a link to my templates! I hope these will help you
make your own Slide N Glide cards!
SLIDE N GLIDE TEMPLATE BASE
SLIDE N GLIDE FLAPS


