Google Translator

Friday, April 29, 2011

3 Step Card!

  I have used the 3 Step Card to make my Mom's Mother's Day card.  I used Tim Holtz's die to make the rosette and Spellbinder's die for the back of the rosette.  The paper is from My Mind's Eye.  I really love their paper!  It's a little more expensive but it really is FABULOUS paper!  Wow, I put alot of metal on this card!  I have had it kicking around and decided it was time to use it.  The leaves are from Marianne Design- another company that I have fallen in love with! You can find another sample of the 3 Step Card at Marianne's blog located here-
The link for the instructions are on her blog but you can find it here as well-
I did change the dimensions on my card.  Marianne's card is beautiful but it is really a large card!  My card is a 6" square card when folded.  That worked best for me.  If you want to make my card you would use a piece of card stock 6" x 10".   Put your card stock in your cutter with the short side on top.  You will be cutting 2 inches in from the side on both sides.  Print out the picture of STEP ONE from the instructions and make the following adjustments-
SCORE-
A-B = 2 inches
C-D = 4 inches
E-F= 4 inches
G-H = 2 inches
CUT-
B-E = 4 inches
D-G= 4 inches
Here are a few more pictures of my card.   Don't hestitate to leave a comment if  you have any questions!


Monday, April 25, 2011

Bar Bill!

One more fun card inspired by Will Bullas's print!  It also struck my funny bone!  Sizzix's glasses die helped to make the martini glass.  My Duck's hands are from  Cuttlebug's  Mickey die/embossing folder. They worked perfectly! The duck can be any shape that you cut with decorative scissors until you get the shape you want.  It's bill is also hand cut- I shaded it a bit with Distress Ink to give it some texture.  I used the Easel card technique to mount the card.   Here is the inspiration for my card!
The sentiment was something I saw on another card sometime ago!  It just seemed like it went with this card!


Sunday, April 24, 2011

Easter Buffet at Taste of Maine!

We had a really nice Easter!  We all went to church this morning and then headed over to the Taste of Maine Restaurant in Woolwich!  The food was really good!   This restaurant is certainly filled with interesting things to look at while you are waiting to be seated.  I didn't even get a chance to take pictures of everything- here are just a few! You can click on them to make the slideshow larger.

Saturday, April 23, 2011

Crow Bar Birthday!

  It is rainy and dreary today and I need to have a little fun!  This card really made me chuckle!  I saw the Crowbar print by Will Bullas in one of our local restaurants and had to try and make it into a card.   Here is the inspiration!  What a hoot!
I used the Glasses Sizzix die for the martini and wine glasses!  They are made of acetate and edged in gold.  I have decorative scissors that I used to give my crows a little texture.  My card fits in a business sized envelope!  This card might not be something to "crow" about but I like it anyway!  Snort, snort...I couldn't resist!!


Friday, April 22, 2011

Queenie's Mother's Day card

I have been working on my Mother-in-Law's Mother's Day card!  I have discovered Marianne Design dies and I love them!  I do use wax paper between the die and the card stock with the leaves die.  This helps the die cut to just fall out!  It is sooo much easier with wax paper.  Lesson learned for me!  I saw the sentiment somewhere and, forgive me, I don't remember where but I really liked it.  I made a couple of little boo-boos but I still really liked how it came out.  You can find the instructions for this Double Box Fold card on Marianne's blog -
She has a sample of her card - which is so beautiful!!  I loved it right away!  Here is a pic of the front of my card-

Sunday, April 17, 2011

Big Office THANK YOU!

I want to say "Thank you" to my staff for holding down the fort while I was out recovering from surgery!  I had made these basket to celebrate Easter and now I can use it for both!  On a trip to the greenhouse- I picked up these miniature roses and I think they look pretty in their baskets.  I have hidden a few Easter yummies in them too!  I hope the staff likes them!


Saturday, April 16, 2011

Back to work!

It is official!  I have been OK'd to return to work! I have been at home after knee surgery for a Menicus tear in my knee and some torn cartiledge.  I was on crutches for about 2 weeks before the surgery and then the recovery for the last 2 weeks. Whew!    I am still trying to get used to walking distances - so my sisters and I went shopping!  There is no better place to see Spring than the local Greenhouse. 
I loved all the bright colors!  There is nothing like flowers to brighten your day! They even have a store mascot!  We almost passed right by since kitty was asleep among the flowers.  What a great place to take a nap!

I took this picture because I loved all the cubbies and the stuff that was in them.  It looks like a fabulous collage!  Very cool!
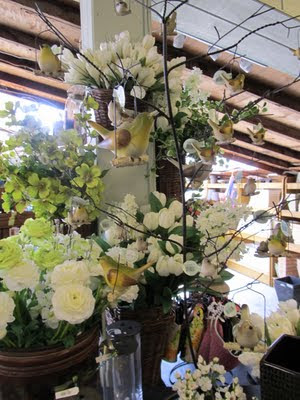
I call this the Bird tree!  I don't know if you can see it in the picture but they hung little birds from all the limbs.  It was really cute!

It was a beautiful Spring day!  Well, I am ready to go back to work on Monday!  Especially, since I know Spring is right around the corner- My favorite time of year!

Thursday, April 14, 2011

Chef Louie!

I decided to do some punch art that I could keep for myself!  I love making cards and I love punch art-I always give my art away- which is fun- but I really wanted something for me.  Wow, that sounded selfish but there you are...!  I was inspired by the picture below that I saw in the restrooms of a local restaurant.  So while waiting in line -I had my sister take a picture of it ( sorry for the glare)!  I thought they were very cool pictures and I planned to attempt to recreate them in paper.   With all the time I have had at home- this was my chance!
I used Claudine Hellmuth's acrylic paint on canvas to create the background. I have had the paints for awhile but have not used them!  What fun it is to paint on canvas!  I really felt like an artist!!   The punch art was a challenge to see what dies I had that would help me make my Chef.   The face is the same technique I use for my clowns with 2 sizes of the heart punch.  The bike wheels were made from 2 sizes of the circle Nestabilities.  The bike itself was from the Marianne Design floral die pictured below.  The umbrella is the top part of the Marianne Design bird cage, again pictured below, and the handle is the stem of the MD floral die. I used the MD floral die to make the chef's hair, too!

Below is the punch art before I added it to the canvas.  I used Claudine's Matte Medium to adhere the punch art to the canvas.  I then went over the piece to seal it.  I am not sure that is the best technique-since the red ran a little and I had to wipe it alittle.  The rest of the colors were fine.  I used alot of Tim Holtz's ink to add shading, for example, on the bread and the chef's apron.  Wow, this was really a big project for me- but alot of fun.  I am going to hang this in my kitchen!!

Here is a close up of Chef Louie!

*****UPDATE******
It bugged me that I did not have the Rooster as in the inspiration picture.  So I added one! The body of the rooster is from Valita's owl punch tutorial.  Check out her blog -
  Here is my completed project!  You can click on the picture for a larger view.


Wednesday, April 13, 2011

Hedgehog Birthday!

I bought this Penny Black stamp months ago and I really haven't used it much.  I love this little Hedgehog! I thought it would make a great birthday card.  The card is the Funky  fold techninque that I have used before.  Cheryl from Sweet Designs by Cheryl did a great video to show you how to make this fun card! http://sweeetdesignsbycheryl.blogspot.com/2010/08/rrr-challenge6-aloha-funky-fold-video.html
My Mom requested a card to give to my sister for her birthday!  I hope they both like this card.  Here is an inside picture-


Friday, April 8, 2011

Anniversary Swans!

I recently purchased Valita's Swan Tutorial!  This is my first attempt but I really love the look of the Swans!  They were so easy to make! I had to wait until I received Stampin Up's Build a Blossom punch but it was worth the wait!  The sentiment is also from Stampin Up.  The sentiment is encircled by JustRite's stamp that I embossed in silver.  I think this is going to be one of my favorite stamp sets.  The quality of the stamps are fabulous!  I used Spellbinder's Labels Twenty to cut it out!   Architectural Sizzlets in silver are at the corners.  I meant to put the Swans at the bottom of the card but I ending up leaving too much space.  So I used some ribbon to fill in the gap. There is so much silver on this card- I think it would be great for a 10th Anniversary card. Isn't that the silver anniversary?   Valita's instructions are fabulous!  I don't know where you come up with your ideas, Valita, but they are just great!! You can purchase her Swan Tutorial here-


Thursday, April 7, 2011

Clown Tutorial

I thought I would show how I made my clown faces for my  "Happy Birthday Clown Card" that you can see if you scroll down.  I use 2 sizes of heart punches- Nestabilities would work well here but I happen to have the punches.  I also used Stampin Up's large oval punch that you can see I cut in half. I use any paper that has a light pink color because I like it to look like skin. The smaller heart is in white-glue that to the larger pink heart but make sure there is enough room for the colored pen to go around it.   The eyes are from SU's 5 petal punch-cut in half- and the medium heart punch-also cut in half.  I am showing you 2 types of eyes- just for fun! 
Once you have glued the eyes to the large oval half -you can see how I position them-you can go around the eyes with the colored pen. Glue the heart to the bottom of your eyes as shown above.   I used SU's owl punch to punch out a nose. 

I also used SU's owl punch to punch out the eye balls and added a little bit of white gel ink to make my clown come alive.  Use your fine tip pen to make the lines above and below the eyes.  I used Martha Stewart's crown punch for my clown's hair- I did use Tim Holtz's Distressed ink to give it a little style.  You really would be surprised at what punches will work as hair-most of your leaf punches really look great!

I used SU's slot punch for the mouth but I also will sometimes just draw a mouth!  You can really be creative with your clowns and get down right silly!  If my clown doesn't wear a hat- I  usually give them drawn eyebrows.

I wanted to show you the end result!   I haven't finished my card but I might not until I have a need for a clown card.  I might use it for a "Get Well" card or a "Happy Birthday" card or even a "Thinking of you" card. I want to keep my options open for now. I should add that I made the umbrella from the top of the Marianne Design bird cage.  I hope you enjoyed my tutorial!  Let me know if you should have any questions!

Wednesday, April 6, 2011

Jordan's Card

I am finally baaackkk...!!  I had knee surgery on Friday, April 1st.  A little nervous about that date!!??! But everything went well.  I had a Meniscus tear and torn cartilage.  I have been able to spend about 30 minutes at a time in my Studio.  Then about 2 hours of the ice pack and rest.  Needless to say, this card took a little time.  It is for a local 13 year old boy who is suffering from Stage 4 Cancer.  His family has asked for cards for him.   I hope he likes my card- I really don't know what a 13 year old boy might like since we raised 2 girls.  But I know my Grandson loves cars!   I was inspired by Tracim's card- I don't have a stamp so of course, I had to recreate it in Punch Art.  You can find Tracim's card here-
http://www.splitcoaststampers.com/gallery/photo/600117?&si=riding along in my automobile
Mind didn't come out like a roadster- I think mine is more like a buggy but I liked it anyway.  I really hope Jordan likes it, too!   The card itself is a Tri-fold card. I have some more pictures below.  You can click on them to make them larger.