Google Translator

Wednesday, January 23, 2013

Valentine Train Block Card!


When I first saw the design for Block cards- I thought they looked like a train or maybe stairs.  I had to try to see if I could make a train come to life.   I made two!  This one is a more straight forward train.  I used SU's oval punch to make the roof of the train.  The wheels are Spellbinder's circle dies with the center a Spellbinder's flower die.  Here is a picture of the back-

My husband did not like my first attempt at turning the Block card into a train- see below.  I was going for Whimsical- He is more of a realist!  

I added a picture of our Grandson as the conductor.  The roof is from a SU punch- the name escapes me.  These block cards are fun to make!  You can check out my previous posts to find the link to the instructions from PaperCrafter 45!


Monday, January 21, 2013

More Block Cards


I had to try and make more BLOCK CARDS!  They are easy and fun to make!!! A co-worker's daughter is having a Baby Boy soon -this card is for her.  I love making Welcome Baby cards!  I used Graphic 45 's beautiful paper to make this project.  I just love their paper!  I can't wait for their new releases to come out!  I posted the link to the instructions on my last post- but here is the link again!  Paper Crafter 45 does a fabulous job with her instructions-


More pictures!


Back side of card

I added some Pacifiers to the inside!

I wanted to show you that the card collapses and fits easily into the box. 


 Paper Crafter 45 also gives instructions for the above box envelope.  It is really for hand delivered cards but it works perfectly - especially if you have a lot of embellishments!  Here is the video link to the envelope/box instructions-

http://www.youtube.com/watch?v=aN0BXBSrxK4


Here is another picture of the BLOCK CARDS and envelope/boxes that I have made so far!!


Friday, January 18, 2013

Valentine Blocks Card


I found the instructions to make this cute Blocks card on Pinterest!   The link to Papercrafter 45's video instructions on YouTube is below-

http://www.youtube.com/watch/?v=4H6Kveu0ctc


I love how you can use up your paper scraps to complete this project.  I added some bling with Creme Pearls. I think I will try a few more projects with Blocks!   Here are a few more pictures-


The other side of the card


Front on view!


Close up!


This was a fun project!

Saturday, January 12, 2013

Birthday Penguin


Yum!


Whew! I can't add pictures to my post the usual way since Blogger seems to be having problems with that function. I was able to use Picasa to add these pictures!  Hooray!  I used the Penquin from my Christmas cards for this Birthday Penquin throne on a previous post.  I think this little guy is so adorable. He may Pop up on other projects this year!!  Here is Dina's fabulous template for this little guy!

http://mamadinis.blogspot.ch/2011/12/penguin-card.html

 I also have posted a link to the instructions for the Birthday throne on a previous post. I will post it again for you- Here is a link to Jan's blog for her instructions on how to make a Cupcake Throne-

http://stampspaperscissors.typepad.com/stamps_paper_scissors/templates_and_showing_off/

Here are a few more pictures of this fun project-

This little guy is from SU's owl punch


I added a litle note at the bottom


Monday, January 7, 2013

Happy New Year!


So much to do and so little time!  The New Year is here - off and running!  It feels like forever since I have posted anything!  I thought I would share a few of things that have been going on!  My sister, Rochelle, gave us our name tags for seating from Christmas!  I recycled them into Thank you cards!  I love these little elves!   Here is a close up!


I used a Snowflake embossing folder for the background and ran silver ink over the raised parts of the card.  Instead of the elf holding a name card - I used decorative paper to make a "gift".  This card was easy since I already had the completed elf!
 
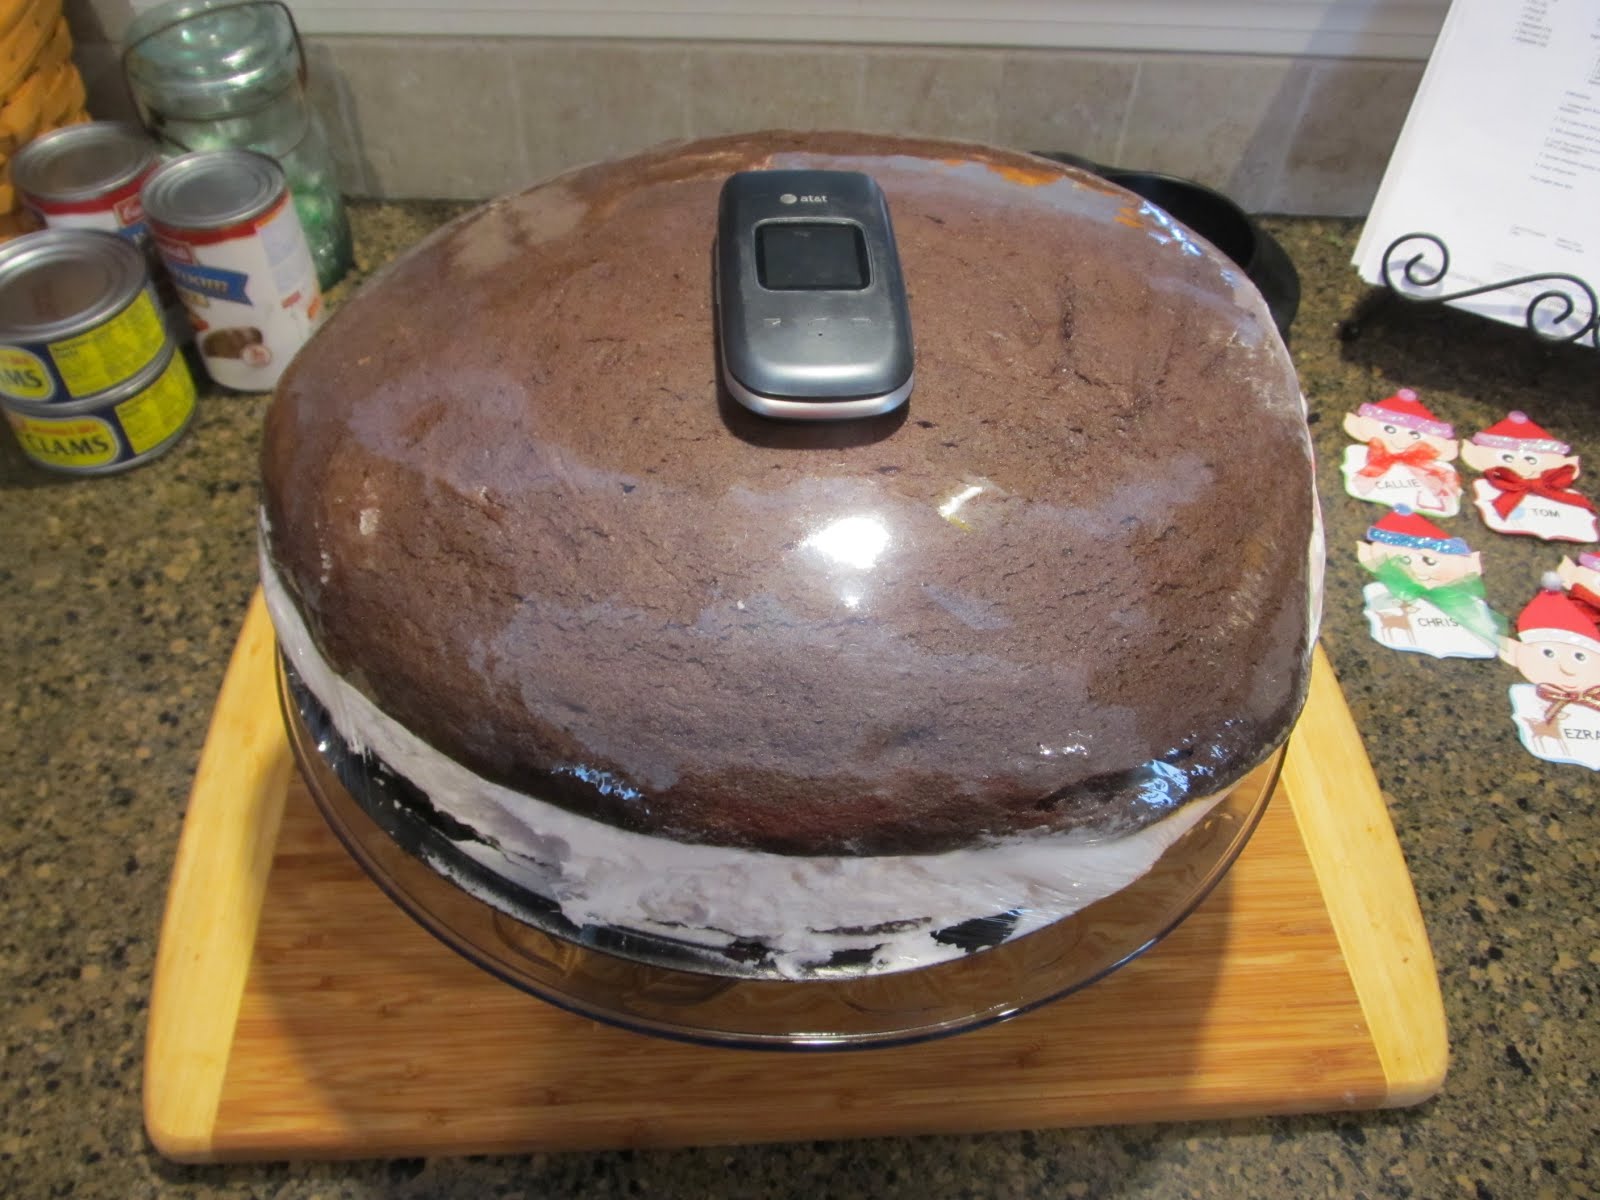
Take a look at the Whoppie Pie below that we bought to share for New Year's Eve!  It's HUGH!  You would think it would be dry since it's SO big.  But no!  It was perfect!  We bought it on our way to Rockland when we took Ezra back to the boat to go home.  We had our Grandson over New Year's Eve!  That was fun too!  The store is Lincoln's Country Store in Warren.  It is our new favorite place to go.  They have a great meat counter there too!  It looks more like a gas station- we have been going by it for years.  My husband only stopped because he was thirsty.  If you go to Rockland -you should stop here for sure!
 

 I had to share  photo of the stairs my hubby just completed!  The stairs lead down to my craft room.  The risers were made with plywood that I had painted white.  I don't have a before picture but I really wanted to change them out.  I saw stairs on Pinterest that were finished with bead board!  I love them and I love how these turned out!  Hubby did a fabooo job!