Google Translator

Sunday, March 30, 2014

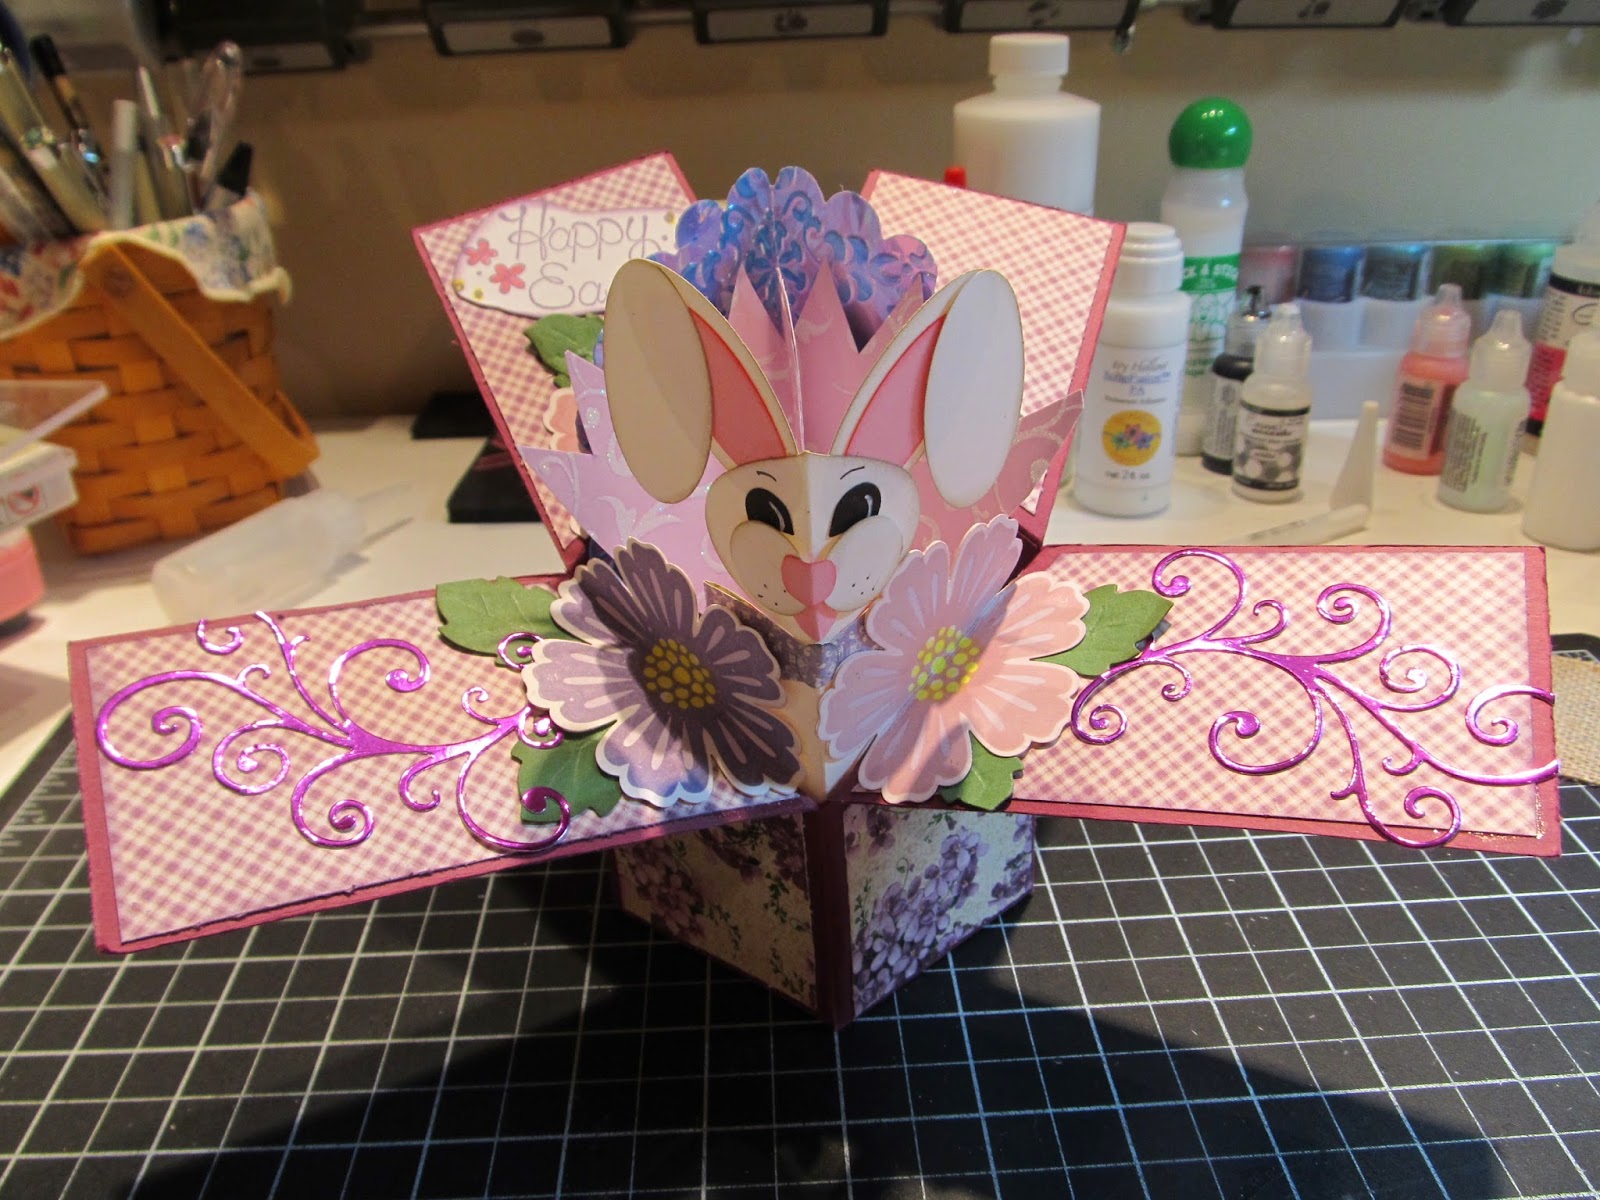
"POP - UP" Easter Card


I have been working on making a real POP UP card.  I bought a commercial pop card and wanted to see if I could recreate the same mechanism.  The mechanism wasn't hard but decorating it was a challenge since everything has to be able to close and then pop when you open it!   The inside of this card has an elastic band that works to make the card Pop up when it is opened.  It's a little different in that you are decorating it on the corner of the box not the center of the box.   Check out the video below to show how it reacts when opened.


This is the card before I started to add some decorations.  I had 2 elastic bands but decided I only needed one.  I used Graphic 45 paper to decorate!


I think I will try to make another one and see what I can come up with for ideas to decorate!
 
  I think it was on line pictures of the  CHA show this winter where  I saw pictures of a boat that had Graphic 45 for the sails.  I thought it was really nice so I wanted to try it myself!
I went Junk'in recently with my sisters and found this great small ship's model for $15.00!!   In the picture below, I am removing the sails and replacing them with Graphic 45's By the Sea paper!!  I love this new collection by Graphic 45!


This is the front!


and the back...


It has a special place in my Craft room!   Can you believe that April is just around the corner!  What a winter!  I am some happy that it is almost over.  Bring on Spring!!


Sunday, March 9, 2014

Pretty in Pink!

 I made this Card in a Box for a friend who turned 60 recently! I do love a pink card so I used pink and cream to decorate.  The inside cream filigree is a die I bought from Heartfelt Creations and I can't remember the name of it!?!   I only used one of the typical inserts you put in a Card in a box but this time I made it into a little square and attached two sides to the corner of the box.  Then I attached the cream filigree die to the outside of the little square.  It is hard to tell from these pictures.  As  you can see I also bent all the flaps down instead of keeping one upright. 


 I added an inside panel and lined the back with embossed Shimmer Sheets from Elizabeth Craft Design.  I really love the way they pick up the light! I did sand it just a little to show the embossing detail.   I love the stars and hearts because when you open the card they seem to explode out of the box!


You can see below that the card still folds to go into an envelope.  I did make this envelope with my Envelope Punch Board!


I did forget to mention the new die I bought that made the front loops.  It is from EK Success but the name of it is lost in the packaging that I threw away.  We have just returned from a vacation with my sister and her husband and my Mom at the Beach Club Resort in Florida at Disney World.  Still resting up from all the fun.  We did all the parks and walked our feet off!  I will share some of the sights from my pictures on my next post!  Now it's back to work Monday.  It is good to be home!


Thursday, February 27, 2014

Flip and Tuck Tutorial


I have made several Flip & Tuck Cards in different sizes to see if it would work with any size card. I am sure this type of card has been done before but it's new to me!  You can watch my video to see how to make this type of card.  I haven't finished the cards above but will have them ready when the need comes for a card instead of having to start from scratch!


Sunday, February 23, 2014

Flip and Tuck Card

 I went shopping this weekend to the Maine Mall.  I love to browse thru the card shops at the mall and check out all the cards.  I am always looking for inspiration! I found a card that had it's own base.  I am not sure what it's called but  I am calling it the "Flip and Tuck" card!


You have to make a notch at the bottom of the card that will insert in the back of the card.  I used my Exacto knife to cut the slot.  The card that I saw had the sentiment on the inside but I think I will put my sentiment on the back.  I am saving this card for the next time I need a birthday card.  This is what the back looks like-


Here is a side shot-
I think I will try a few more cards in different sizes.  I like the fact that it can fold flat and be sent thru the mail.  I also loved the Painted Glitter technique that I used on this card.  I have done it before but had forgotten how much I love it!  Here is a shot of the Outlined stickers I used from Elizabeth Crafts!

Check out this fabulous tutorial that give excellent directions on this technique-


Friday, February 14, 2014

Happy Valentine's Day!


I found the instructions for this cute Treat Box on Pinterest.  I did practice making it on a plain sheet of paper so I would get the hang of it.  Check out the tutorial here-

http://morethanstamping.blogspot.ca/2014/01/free-tutorial-happy-new-year-treat.html


I will be taking these to work today for my staff.  I think the candy I put inside the boxes are a little too big for the front opening but they can be reused for candy more like M&M's or candy hearts!


I used the die from MFT's to make the bows on top of the box!  I am headed to work this morning after the snow storm yesterday that went into the night.  I hope the roads are plowed and sanded!  Happy a great day!


Monday, February 10, 2014

Bus Building Block Valentine Card


I am on a roll!  I love the Building Block technique that Laura at Splitcoast Stampers is demonstrating now!   Check out her instructions here-


I am making this card for our Grandson, Ezra! I have to get it into the mail tomorrow so it will make it to the island on time!   He loves riding the bus to school so I thought he might like this for a Valentine's card!  I purchased the instructions for the bus from Lynn Pratt quite awhile ago.  It also comes with instructions for a Firetruck and a Police car!  They are adorable!  You can find/ purchase her instructions here-


Here are a couple more pictures of my card!


Sunday, February 9, 2014

Mom's Valentine Card


I have been busy making Valentine Treat boxes but still haven't completed them!  I thought I would show you the Valentine's Day card I made for my Mom.  I saw the tutorial on Splitcoast Stamper's for this Building Block Card!   I loved it right away!  I love trying out different types of cards. This one isn't too hard to make! I used mostly Graphic 45 paper to decorate the card. You can't see the sentiment too well-it says, " There is no blessing quite so dear...as a Mom like you to love year after year"!   It is sooo true of my Mom!  I can't wait to give it to her!    Check out the tutorial here-

http://www.splitcoaststampers.com/resources/tutorials/buildingblockcard/

I used Impression Obsession's die cut for the flower! I just purchased this the other day and it is so beautiful!  It really makes a lovely flower!


I like to add a magnetic square to the back of the original packaging to store the die.


Here's another picture of this card!


Once I finish my treat boxes - I will share them!  I have recovered from the tooth I had pulled.  Not fun!  It takes forever for your tongue to realize the tooth it gone.  The gum is still rather sensitive so nothing too tough to eat.  I guess I will survive!   Have fun!